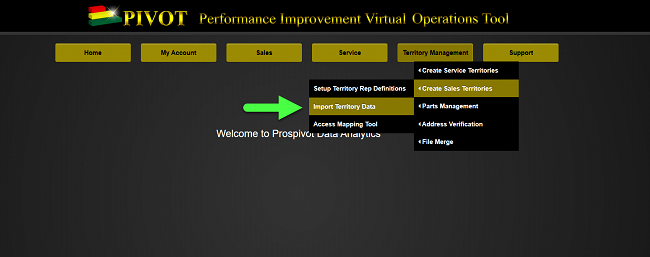
12.3 Import Sales Territory Data - Manual Process
1. From the Home page Select Territory Management
a. Select- Create Sales Territory
b. Select- Import Territory Data
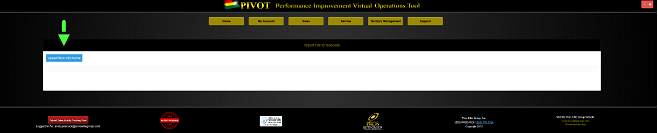
2. Select BLUE Upload icon
3. Select Geocoded B/W Sales Data File from your computer
Note: File name may be different
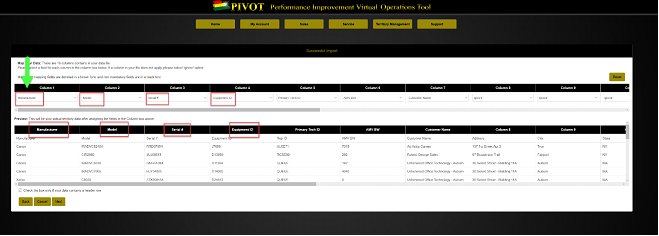
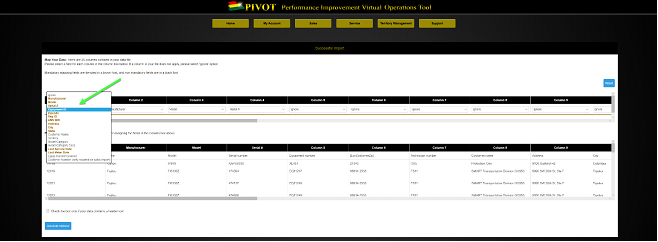
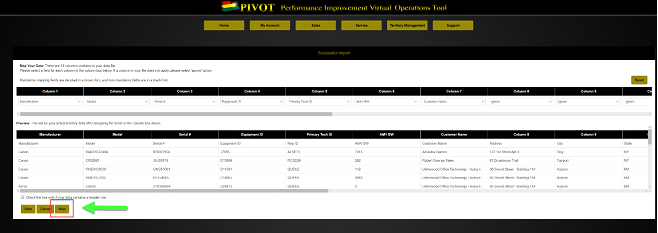
4. Starting with the Column 1 dropdown window, link top Pivot Columns with the appropriate Data Columns
Ex. Select dropdown “Manufacturer” top row to match “Manufacturer” on bottom row.
5. With all appropriate Columns linked, select the Next button
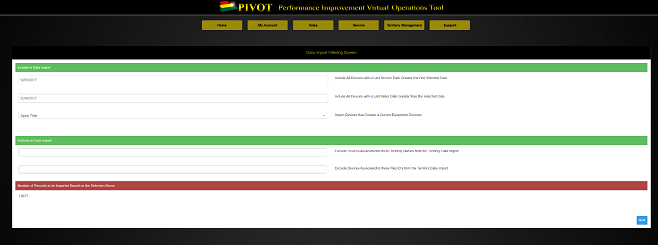
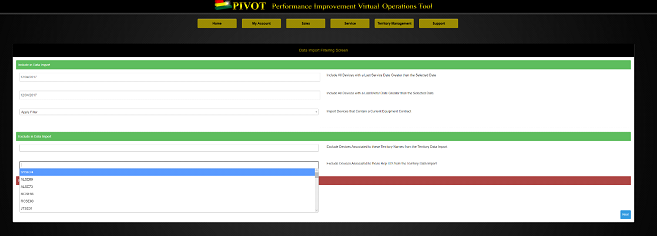
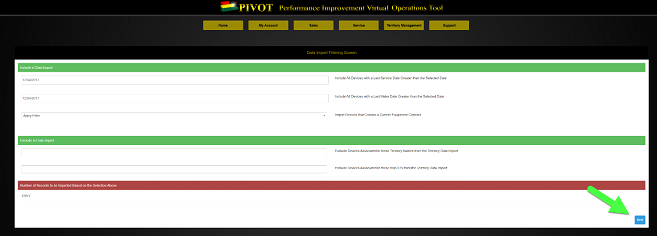
6. Data Import Filter
Note: Dates included in data upload (default 18 month)
Example: Apply Filter for Rep data
7. When filtering is complete select the BLUE Next button
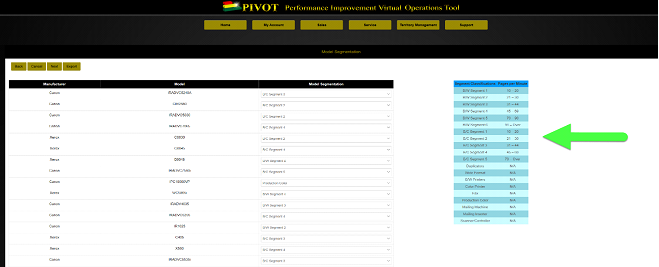
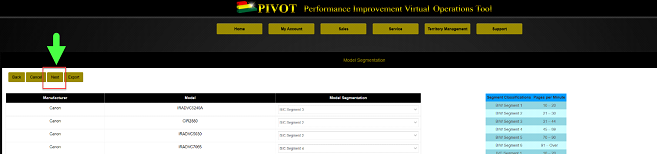
8. Review Model Segmentations- Review Segment Classifications
Note: Select Segments for any highlighted Model Segmentations
not identified by Pivot
9. Select Next button
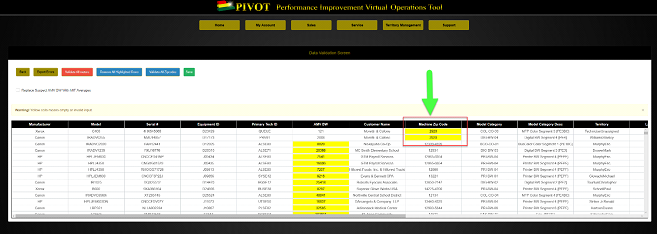
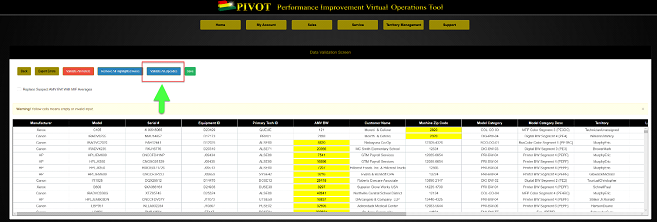
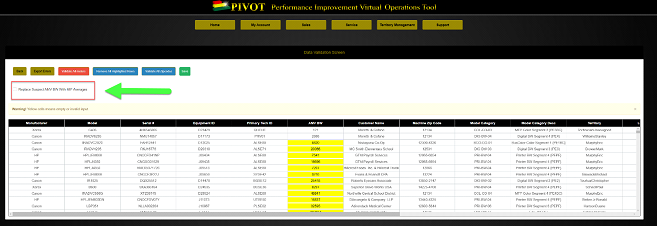
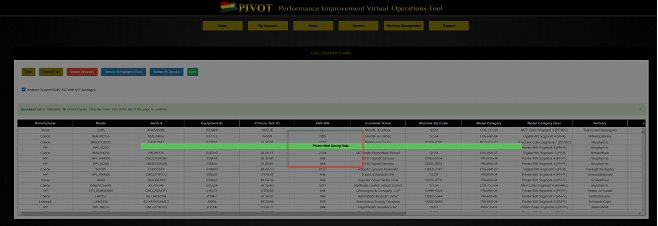
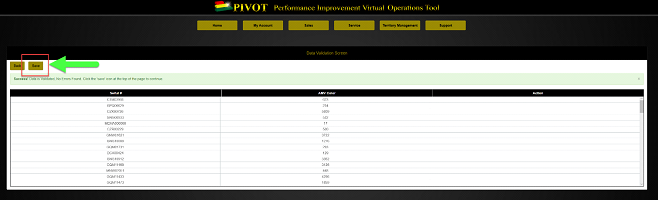
10. Review Data Validation
a. Correct any missing or incorrect Zip codes
11. Validate ALL Zip Codes
a. Once you have corrected the missing or incorrect zip codes, click on the BLUE “Validate ALL Zip Codes” button
12. Click and select “Replace Suspect AMV Tab” to automatically average Suspect Meters
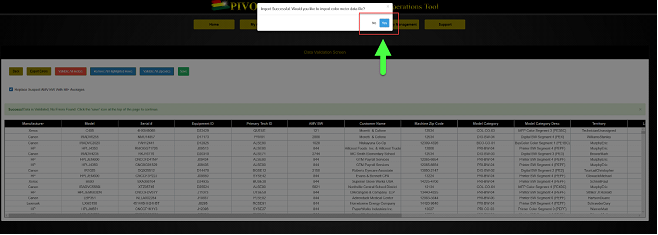
13. Select SAVE button to overwrite previous uploads (if applicable)
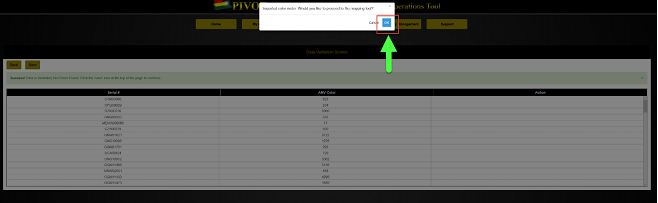
14. Import Color Meter Data (if applicable)
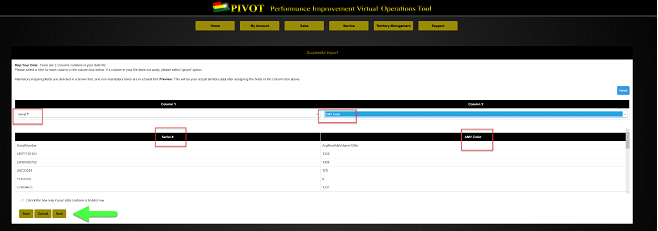
15. Link UPPER column with LOWER columns, only the fields below are required for color data
a. Serial Number
b. AMV (Color)
16. After linking fields, click NEXT
17. Upon successful validation of data, click SAVE
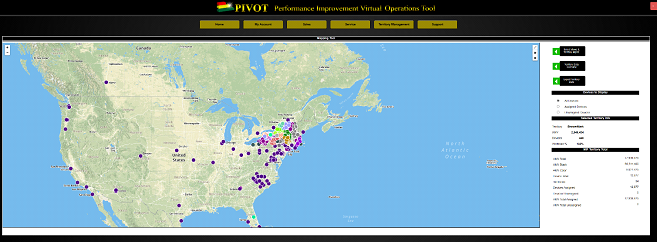
18. Proceed to Mapping Tool
19. Mapping Tool